Thursday, February 27, 2014

"Healthy" No-Bake Chocolate Fudge

I got this recipe from my mum, who was given it by a friend. I tried it for Christmas this year (I gave everyone in the family here a tin full of yummy baking) and absolutely loved it! This recipe was the easiest one I made, and in my opinion, the most delicious! It was also the healthiest, and really, it is, especially if you use dark chocolate!

Be warned, though, this stuff is highly addictive… addicting? Does it matter?

1 cup peanut butter (I used crunchy!)
1/2 cup coconut oil
1/2 cup honey
1 cup shredded coconut
1 cups rolled oats
1 1/4 cups dark chocolate chips
1 tsp vanilla


Melt the peanut butter, coconut oil and honey in a sauce pan on medium heat. Remove from heat and add the vanilla, oats, coconut and chocolate chips, stirring till the chocolate is melted. Place in a 9x9 pan and stick in the fridge to cool. Cut, enjoy!


Yummy! Ridiculously easy!


Be sure to keep this fudge refrigerated; it goes very soft at room temperature because of the coconut oil.

Monday, February 24, 2014

Rhassoul Clay Mask

My friend, Brittany, and I have many things in common. Firstly, our sons share a birthday. Second, we are both incredibly interested in going more green and natural, and where we've started is with health (yoga and food), beauty (getting rid of old beauty products and either buying natural or making our own), and household cleaning (as both our little ones are starting to crawl, we've stopped using all chemical cleaners and instead use vinegar, lemons, baking soda, salt etc and essential oils). It has been a lot of fun, because we try different things, talk to the other about them and compare experiences, and bounce ideas off each other. So on this track, we decided to place an order from New Directions Aromatics (NDA) for a few ingredients to kick us off on making beauty products. This way, we split a couple things so that it was a bit less of an investment in case we didn't like it. I'm happy to say that was unnecessary! So far, I love everything, and I got a LOT! :-D

Eek!


We split a kg of cocoa butter, shea butter and beeswax, and then I got: witch hazel, aloe, vegetable glycerine, rhassoul clay, and essential oils - lemon, bergamot, vanilla 10 fold, sweet birch, cinnamon bark, grapefruit and wintergreen! Beyond stoked!!

I have so many things I'm going to make with these - safe cleaning products, lip balm, body balm/lotion, face masks, some sort of shaving cream for Adrian... And that's just a few ideas. So as I said, this order is just to get us started and experimenting, and then I know I'll be placing another in a few months and get some more things. There's also another website - Saffire Blue - that I'll be ordering from in the future as well for some things that I couldn't get from NDA. Very excited to get going on these!

However, I got the order yesterday and just didn't have it in me to jump right in and start experimenting, so I decided to try the easiest thing - the rhassoul clay mask! Simple add water. Brainless, effortless, perfect.

I was originally going to get French green clay, because I though it was the "fancier" one. However, after doing some reading, I decided to get this Moroccan clay instead.

Rhassoul clay is mined from the Atlas mountains in northeastern Morocco. It is extracted, washed, sun dried and then ground into a fine powder. It is reddish brown in colour and mixes into a beautiful, smooth paste in water. This clay is also higher in a number of minerals than other clays, so it's incredibly moisturizing, clarifying and absorbent. It's great as a hair conditioner or even shampoo, and a detoxifying face and body mask as it helps control sebum  production and sloughs away dead skin. It's mineral content is as follows:

Silica - 58%
Aluminum - 2.47%
Iron - .64%
Sodium - 2.3%
Magnesium - 25.2%
Calcium - 2.34%
Moisture - <8%

It is reported to reduce dryness, improve elasticity and clarity, and even extract blackheads, unblock pores and remove dead skin! As a hair mask, it's supposed to remove residue and leave your hair feeling voluminous and light.

I haven't used it as a hair mask yet (but will!!), but I can attest to everything this clay is supposed to do for the skin!


Beautiful texture!
Already starting to dry, immediately following application.
It is so smoothing and hydrating - my fingers immediately felt moisturized and smooth just from applying it! I smoothed it on quite thick, because as usual, I mixed up too much, and it started drying immediately. I may have left it on for a bit to long (again, a common occurrence with me... I get going on something and lose track of time) because I decided since Jaxson was down, this was a perfect time for me to update my blog! By the time I was done, I felt like I couldn't move my face at all, it had tightened so much.

Dry, cracking, TIGHT!
Rehydrating it felt amazing. Just because it felt so good, before I washed it off completely, I wet my fingers with water and patted my face. The clay soaked the water right up and started to soften and loosen. After that, I wet it a bit more and gently massaged it into my skin in small circles to exfoliate. It felt so soft and smooth, not gritty or harsh at all. I washed it off after this, which was very easy to do as it started to just fall off my face in little clumps.

I could not believe how soft and smooth my face felt. It felt completely hydrated and almost like the bumps were smoothed over. The most amazing thing for me though, because I was not expecting this at all, was that the blackheads on my nose were visibly reduced! I was so impressed.

One thing that happened, and it may have been because I left it on too long, was that my forehead got all red and splotchy. However, it went away in no time at all. I think my skin just got a bit irritated because it tightened so much!

A day later, and my skin still feels smooth and looks more clear and radiant. I love this clay!

Source: Amal Oils

Saturday, February 22, 2014

Oatmeal Bread

Bread day again!


Tassajara Bread Technique:

Mix the activated yeast (water, yeast, honey, water) with 4 cups of flour. Cover and let rise for 1 hour.
Add oil and salt, fold in. At this stage, add your extra ingredient, if any (oats). Fold in.
Add 3-4 cups of flour until the dough pulls away from the sides of the bowl. 
Turn onto a floured board and knead for 8-10 minutes, until smooth, adding flour as necessary.
Shape into a ball and place in an oiled bowl. Cover and let rise for 50 minutes.
Punch down. Cover and let rise for 40 minutes.
Cut in half, knead each half for 3-5 minutes and then shape into loaves. Place in oiled loaf pans, flatten with your fingers, and then cover and let rise for 20-25 minutes while the oven is preheating (350). 
Bake for 50-60 minutes, remove from pans and cool on a wire rack.

I'm a huge fan of beautiful, big, fluffy bread, but as I'm getting more comfortable with the techniques in the Tassajara Bread Book, I'm starting to branch out more.


This time round I tried an oatmeal bread, because I wanted something a bit more hearty and nutritious.

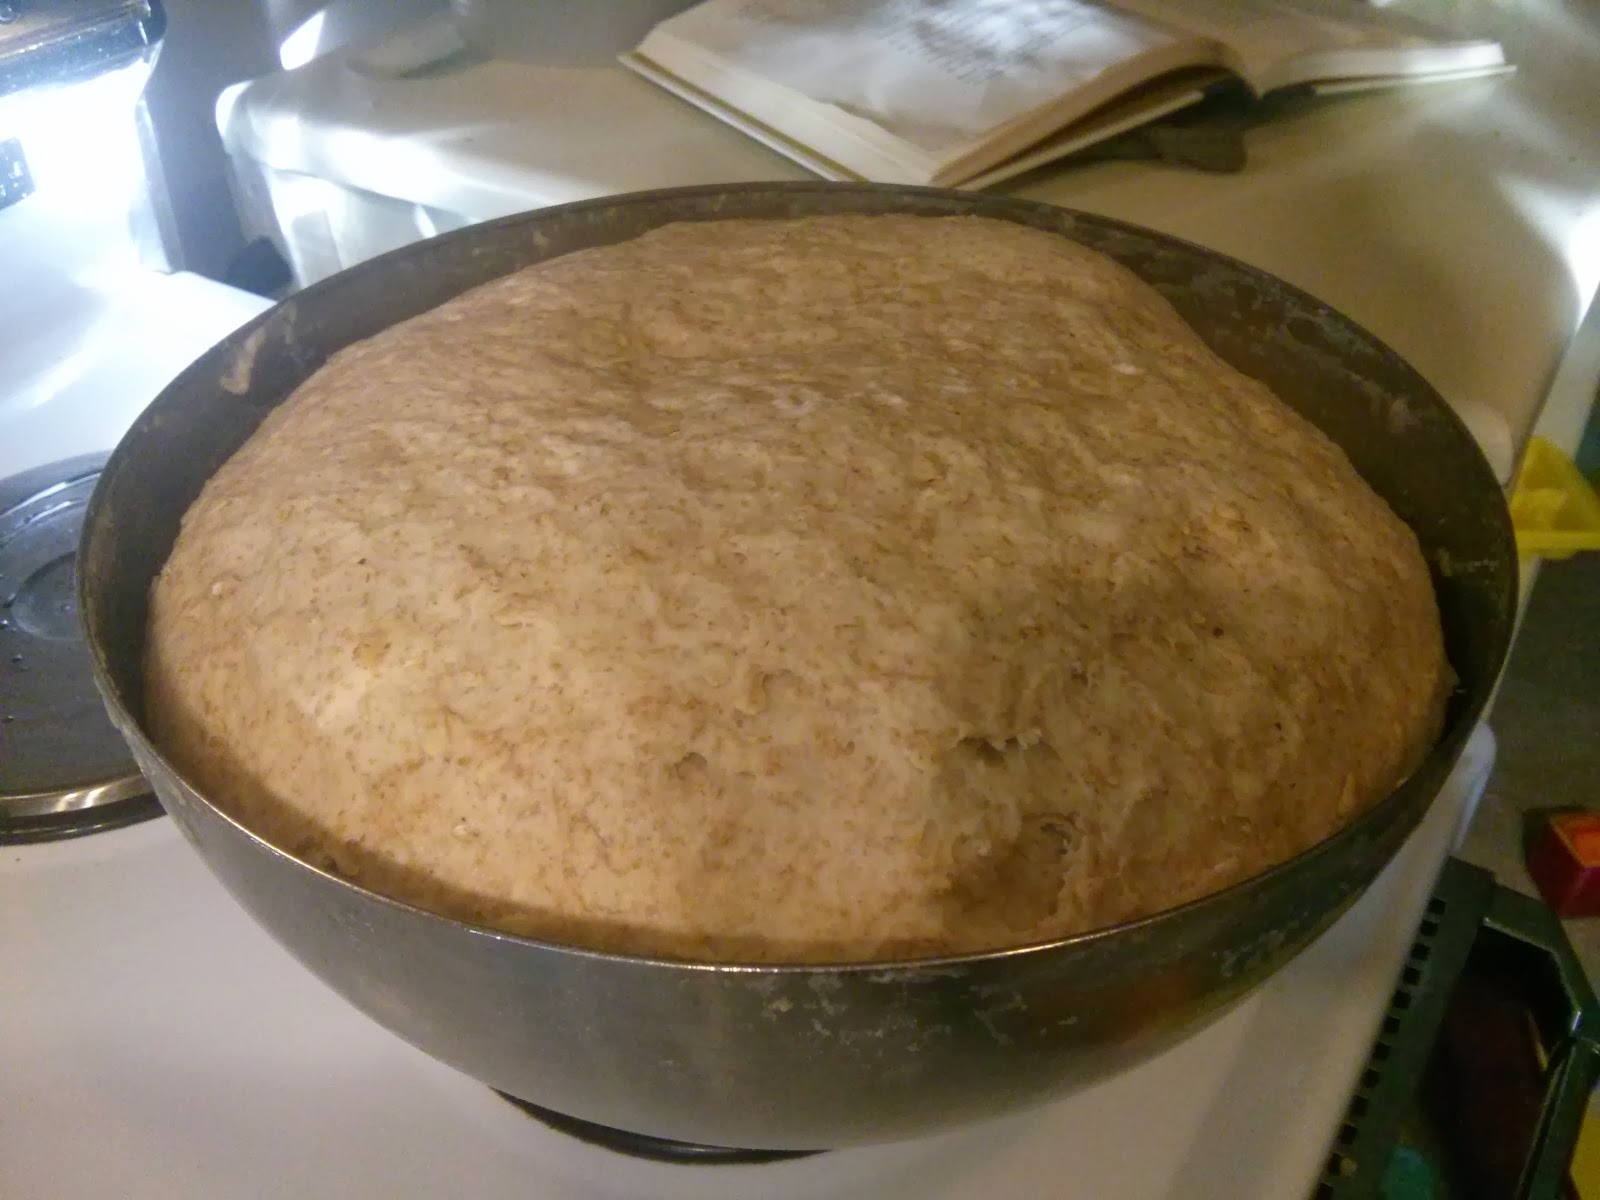
As usual, with this book, it turned out really well! It's very different from the other ones I've tried though! For starters, it didn't rise as much, at any of the stages. For instance, when they were shaped into loaves, I usually only let them rise for 20 minutes while the oven is preheating, but this time, I let them rise for 40 minutes and they only rose as much as the other recipes do in half the time! Another big difference was the texture and weight of it while kneading. It was a lot harder to knead, stiffer, denser.


After rising for 40 minutes, this is all they rose!
It tastes amazing though! Sweet and chewy and moist. Heavy, so you don't need as much in one sitting (whereas with the white egg bread, I could have eaten half a loaf for one meal!). In my opinion, it's a perfect, filling bread for toast in the morning. It would taste amazing with butter and honey.

The recipe suggests using molasses instead of honey, but I only had blackstrap and that's way too strong. However, I'm going to get some fancy molasses and try this bread again using that and see what the difference is!

Baked at 350 for 50 minutes

What To Do With Leftover Coffee, Part 1: Mocha Cupcakes with Coffee Buttercream Frosting

The other day, we made up a larger than normal pot of coffee, thinking for sure we'd drink it all after staying up later than we should and getting woken up early by Jaxson. We didn't finish it, but instead of just tossing it, I looked up recipes for using up brewed coffee and found a delicious sounding one that would also satisfy my chocolate craving - perfect!

So I gave it a try. It was ridiculously easy and I was able to make them in time for Adrian to bring some to work for the manager's meeting. As usual, my presentation was lacking, but they tasted really good!

Recipe:
For the cupcakes:
1 1/3 cup flour
1/3 cup unsweetened cocoa powder
1 tsp baking powder
1/2 tsp baking soda
1/4 tsp salt
1/2 cup milk
1/2 cup strong brewed coffee, cooled
1 1/2 tsp espresso powder
1 tsp vanilla 
1/2 cup unsalted butter, at room temperature
1/2 cup sugar
1/2 cup light brown sugar
1 egg, at room temperature

For the icing:
1 cup unsalted butter, at room temperature
2 1/2 cups powdered sugar
1 1/2 tsp vanilla
1 1/2 tsp espresso powder


Preheat oven to 350 and dissolve the espresso powered in the brewed coffee. Cream together the butter and sugars. Add the egg, beat. Combine the milk, coffee and vanilla in one bowl and the dry ingredients in another. Add to the butter mixture slowly, alternating so you finish with the dry ingredients. Divide the batter evenly in a lined 12-cupcake pan. Bake for 17-20 minutes. To make the icing, beat the butter until it's fluffy. Add the sugar slowly, fully incorporating it before each addition. Dissolve the espresso powered in the vanilla and add.


Yum!
I made a couple changes to the recipe. First of all, I added chocolate chips to the cupcakes, and I didn't use as much espresso powder as it calls for, because I didn't like the taste last time I used it, for the Pecan Coffee Toffee Cake. For the same reason, I used about 2 tbsp of coffee in the icing instead of espresso powder. This, unfortunately, really changed the consistency of it, so I also added about 2 tbsp of cream cheese to thicken it up. On top of that, I only used about 1 ½ cups of icing sugar, because I felt it was sweet enough at that point and I'm not a fan of really sweet icing.

Despite the change in consistency of the icing, and therefore my inability to make it look nice on the cupcake (yes, it's all the icing's fault, not mine!), they were great!

If you don't have a piping bad, a simple trick is to put your icing in a ziplock bag and then cut one of the bottom corners off.

Voila!
I plan on experimenting with more recipes like this whenever I have leftover coffee!

Sunday, February 16, 2014

Honey and Turmeric Face Mask

On the same track that I've been this week, I decided to try another mask. Jaxson was napping, I had a new bread recipe rising and the laundry was in. I had nothing urgent to do, and this is the only time during the day that I have for myself - the perfect time for a staining face mask!

I've been reading about the benefits of turmeric and honey lately, and am really jazzed with both. I've been baking regularly with honey and am trying to put turmeric in more cooking, and have been dying to try both out on my face as well.

Internally, turmeric is supposed to help with inflammation and arthritis, strengthen the heart, aid in the prevention of cancerous growth, fight Alzheimer's, and lower cholesterol just to name a few. It has been used for centuries in both Chinese and Indian medicine. Externally, it's apparently good for inflammation as well, it also evens out skin tone and lightens dark spots, acts as a deep cleanser, moisturizes, and prevents breakouts and acne. It's a very powerful anti-oxidant, can reduce the appearance of scars and wrinkles, and treats skin conditions like psoriasis and eczema. It is both antiseptic and antibacterial.

Externally, honey is anti-aging and moisturizing. It is anti-microbial and chock full of antioxidants as well, to rejuvenate the skin and aid in healing. Honey is an antiseptic, so it is ideal for treating breakouts. Honey is also a great anti-bacterial and anti-fungal, and so it a perfect ingredient to healing poultices for minor scrapes and burns. Internally, honey has been shown to promote heart health by increasing blood circulation and preventing clogged arteries and reducing cholesterol. It's anti-oxidant and anti-bacterial properties also help to boost your immune system.

I've done a mask like this once, years ago, with my best friend Jen, but I don't remember putting yogurt in it, so I decided on this recipe, to see what it would be like:

1 tbsp honey
1 tbsp turmeric
1 tbsp greek yogurt

Turmeric, greek yogurt, Manuka honey!
I had Manuka honey in the fridge that I use very rarely, so I thought I'd really treat my face and use it for this mask, especially because I didn't need much of it. I had to warm it up slightly so I could mix in the turmeric and yogurt!

Melted the honey so I could mix in the turmeric.

Just 1 tbsp of yogurt, even though the 'recipe' called for 2.

Beautiful, sunny colour, non?

This amount ended up making enough for two people, so I could recommend either having the recipe, or doing it with a friend. I'm not sure if it'll keep, but I put the leftovers in a bag in the fridge so I could do this again later this week.

I put it all over my face, and then read you're not supposed to put it in your eyebrows because it's used for hair removal (after more reading, I discovered that apparently this is only if you apply it on a regular basis), so I ran to the bathroom and wiped it off in a flash. No harm done. That'll teach me to read the instructions fully before I just jump right in! The website recommends applying with gloves, but I don't think that's necessary if you're quick and wash your hands with hot water right away.


Bright! I wrapped myself in yellow towels, so any staining would just blend right in! 
One thing I really liked about this is about 10 minutes in, it started getting warm and tingly (a good sign with turmeric). 

I ended up leaving it on for a bit longer than this website suggests, because the bread was done rising and I needed to knead it. I'm not sure if this made a difference, or if I just didn't put enough yogurt in, but it definitely stained my face. Just a bit, and after I toned, that took a bit of it off. By the end of the day, there was no yellow tinge at all. Good thing I had no where to go today! To get it off, I would most definitely recommend hopping in the shower - I did and am glad! It would have been a disaster if I'd tried to get it off over the sink.

30 minutes later, ready to get this off!
Another thing I enjoyed about this mask is there was a bit of exfoliation as I rubbed it off. Nice and gentle.

I really liked it, but next time I think I'll add a bit more yogurt, or bentonite clay and see if that makes any difference in the staining department.

Sources:

http://www.stylecraze.com/articles/7-benefits-and-uses-of-honey/
http://multiculturalbeauty.about.com/od/Skincare/a/Turmeric-For-Beauty.htm
http://www.whfoods.com/genpage.php?tname=foodspice&dbid=78

Saturday, February 15, 2014

White Egg Bread


Today was bread day, but I wanted to try something different from the Tassajara bread book to change it up a bit this week. We just started buying local farm eggs (finally found some here, and i'm obsessed!) so I decided to go with an egg bread!


Tassajara Bread Technique:

Mix the activated yeast (water, yeast, honey, water) with 4 cups of flour. Cover and let rise for 1 hour.
Add oil and salt, fold in. At this stage, add your extra ingredient, if any (oats). Fold in.
Add 3-4 cups of flour until the dough pulls away from the sides of the bowl. 
Turn onto a floured board and knead for 8-10 minutes, until smooth, adding flour as necessary.
Shape into a ball and place in an oiled bowl. Cover and let rise for 50 minutes.
Punch down. Cover and let rise for 40 minutes.
Cut in half, knead each half for 3-5 minutes and then shape into loaves. Place in oiled loaf pans, flatten with your fingers, and then cover and let rise for 20-25 minutes while the oven is preheating (350). 
Bake for 50-60 minutes, remove from pans and cool on a wire rack.

The sponge was a beautiful creamy colour and I loved the texture of the dough when I was kneading it. It was so silky, smooth, quite dense when it's punched down, but beautifully fluffy when it had risen! Very different from the traditional yeasted bread.

Mix the beat eggs into the activated yeast.

Mix the yeast and eggs into 4 cups of flour, let rise for 45 minutes.

Gorgeous sponge! Folding in the salt and oil

Beautiful dough, kneaded with another cups of flour and ready for the first 1 hour rise. Dense and silky.
Look how much that rises! Punch down and let it rise for another 50 minutes.

I was a little worried about it, because the last rise, when it was shaped into loaves, didn't rise as much as the traditional bread does. But holy cow! It rose so much while baking. I sprinkled it with chia seeds to try something new. The recipe says to do the same, but with poppy seeds, so I thought chia seeds would be a great substitute, and so much better for you. I liked them, but next time I would mix them right into the dough, because they just ended up falling off the top when I cut it.

After I shaped it into loaves, I let it rise for another 25 minutes while the oven is preheating.
Brushed with butter, sprinkled with chia seeds, ready to bake.
I baked them at 350 for just 50 minutes, because the last few loaves i've done for an hour, and I felt they were just slightly over cooked. 


 I couldn't believe it! It rose so much, the slit I cut in it to release air split! 

Plus, it tastes fabulous. Dense but fluffy, chewy, scrumptious! 

Friday, February 14, 2014

Supermom? What's that?

Let me preface this post by saying that I absolutely love being a mum. The wonder, the sense of accomplishment, the joy, the love... Oh the love. There is no possible way to express the depth of this love in the English language. Jaxson makes me emotional, protective, confident, strong, weak, fearful, joyful, worried, proud, excited, and frustrated… Oh the frustration!

Yesterday, I felt this more than I ever have! It was, hands down, the most frustrating day I've had as a mum yet!

Here's what happened:

There was no indication that yesterday was going to be as awful as it was. Jaxson had a great 10 hour sleep, woke up at about 7:30, nursed in bed with me and then I got up with him and made him breakfast. At about 9, he started getting tired again, as usual, so I put him down for his first nap. Unusually, he screamed for about 10 minutes before he finally went down. 

He slept until 11:30, a fantastic, but fairly standard nap, and the day just went downhill from here.
Part of the problem may have been that I had a long list of things I wanted to get done (i'm sure to non-mum's it doesn't seem like much, but it's amazing how long it takes you to do things when you become a mum!): I cleaned my makeup brushes, and put one of two loads of laundry in before he woke up.

When Jaxson did wake up, I let him crawl around a little bit, before I fed him. In hindsight, this may have been a mistake. While I tried to tidy the kitchen, do a few dishes and then start to peel and quarter pears so I could steam them, Jaxson first got his fingers pinched in the drawers in the kitchen, pulled all the tupperware off the shelf and then attacked Yuki's water dish with a vengeance! No matter how many times I moved him to his play area in the living room, I could not keep him away from it! So I plunked him down in his high chair and gave him some finger food so I could get a bit more done. He was ok for a bit, a little fussy because I could not keep up with his hunger; I couldn't get food on his tray fast enough! He must be going through another growth spurt…

While he was in the highchair, I was able to peel and quarter a bag of pears and put them on to steam. At this point, he was done eating, so I let him down and then went to try make myself something to eat, as it was almost 2pm! I turned my back to chop some onions and garlic and put them in a pan to fry, and fry up some ground beef that needed to be cooked before it went bad. When I looked back, he had disappeared! The only place he could have gone in our tiny suite was the bathroom! I ran in there, fearful of the worst, and found him sitting by the toilet, a pile of cold poo that I had dumped in there from his diaper earlier on the floor in front of him. GAH! I swept him up in a huff, stripped him down and plunked him in the sink, soaping with quite warm water his arms, hands, face, and as luck would have it, his tongue as he has taken to sticking it out when I wash his face. I had to go back to my onions, which were starting to brown, and the ground beef, which was starting to stick to the pan, so I put him down in the living room. Before I knew what was happening, he had raced to Yuki's dog dish and spilled the whole slobbery bowl onto the floor. 

This was the point I lost it. My onions were burning, i'd just soaped him down, i'd been chasing him around all morning, and now I had to mop up the kitchen floor. That was it. I scooped him up and plopped him down in his crib for his first ever time out! Needless to say, my little darling was not happy about this, but I needed just a few minutes to breathe and eat something. I went back to the stove, where my onions and garlic were now black and the house was all smokey. It was at this point that my friend Brittany and her son came over. She walked in to a screaming baby in the bedroom, a smokey house and me on the fritz! The only thing she said when she walked in was "oh my!" I proceeded to vent, put my finished, though burnt, lunch in a bowl and then went to get Jaxson. He was sobbing, tears glistening on his cheeks, his face red, his body wracked with sobs. The minute I picked him up, he stopped, gave me and then Brittany a great big smile and grabbed onto my shirt and did NOT let go! Pretty cute, though manipulative, I have to admit. 

He was great while Brittany and Evan were there, but once they left, he went back to his fussy self. For the rest of the day, I couldn't put him down and walk away from him without him throwing a little tantrum!

Into the evening, I put him in his exersaucer so I could finish the second load of laundry and then get dinner prepped and in the oven for when Adrian got home, and he very nearly climbed out of the darn thing! That's how much he hates being immobilized these days… I didn't even think it was possible to get out of those! Thankfully he didn't succeed, but he got far closer than I'm comfortable with… To settle him down, when I finally had dinner in the oven, I gave him a bath. Thankfully, he loves baths, and that kept him entertained for about a half hour!

Oh man, what a day! I love my little bug, but by the end of the day, I needed a big glass of wine! A smile and the loving look in his eyes made all the frustrations of the day melt away though. I think it's pretty amazing how a simple smile from him can make me feel that way. There's no love like that between a mother and her child!